3.3 Good practice and getting our hands dirty with spatial evidence!
Good habits for setting up your own project and getting started
3.1 and 3.2 covered where spatial evidence comes from and the tools we’ll use to work with it. Here, we briefly cover some good practices on how to organise a project so it stays manageable and a general workflow we can apply to any spatial data task.
3.3.1 Organising our project and files
Before starting - project set-up
Good organisation of our project is important to keep track of our data inputs, scripts, and outputs, and to make sure our work is reproducible and shareable. A few simple habits go a long way to keeping the work manageable and transparent.
When we open or start a new project, the first step is to create an RStudio Project (File → New Project). A Project ties our scripts, data, and outputs to a single, self-contained folder.
Next, we should set-up our folder structure (before we start adding data or writing any code), so that everything has a place to go from the outset instead of needing to be untangled and reorganised later. A good folder structure is simple and consistent, for example:
my-project/
├── data/
│   ├── raw/            # data exactly as downloaded or retrieved (not edited)
│   └── processed/       # cleaned or processed data we've created
├── scripts/             # our R scripts, in the order they're run
├── outputs/              # maps, tables, and figures we produce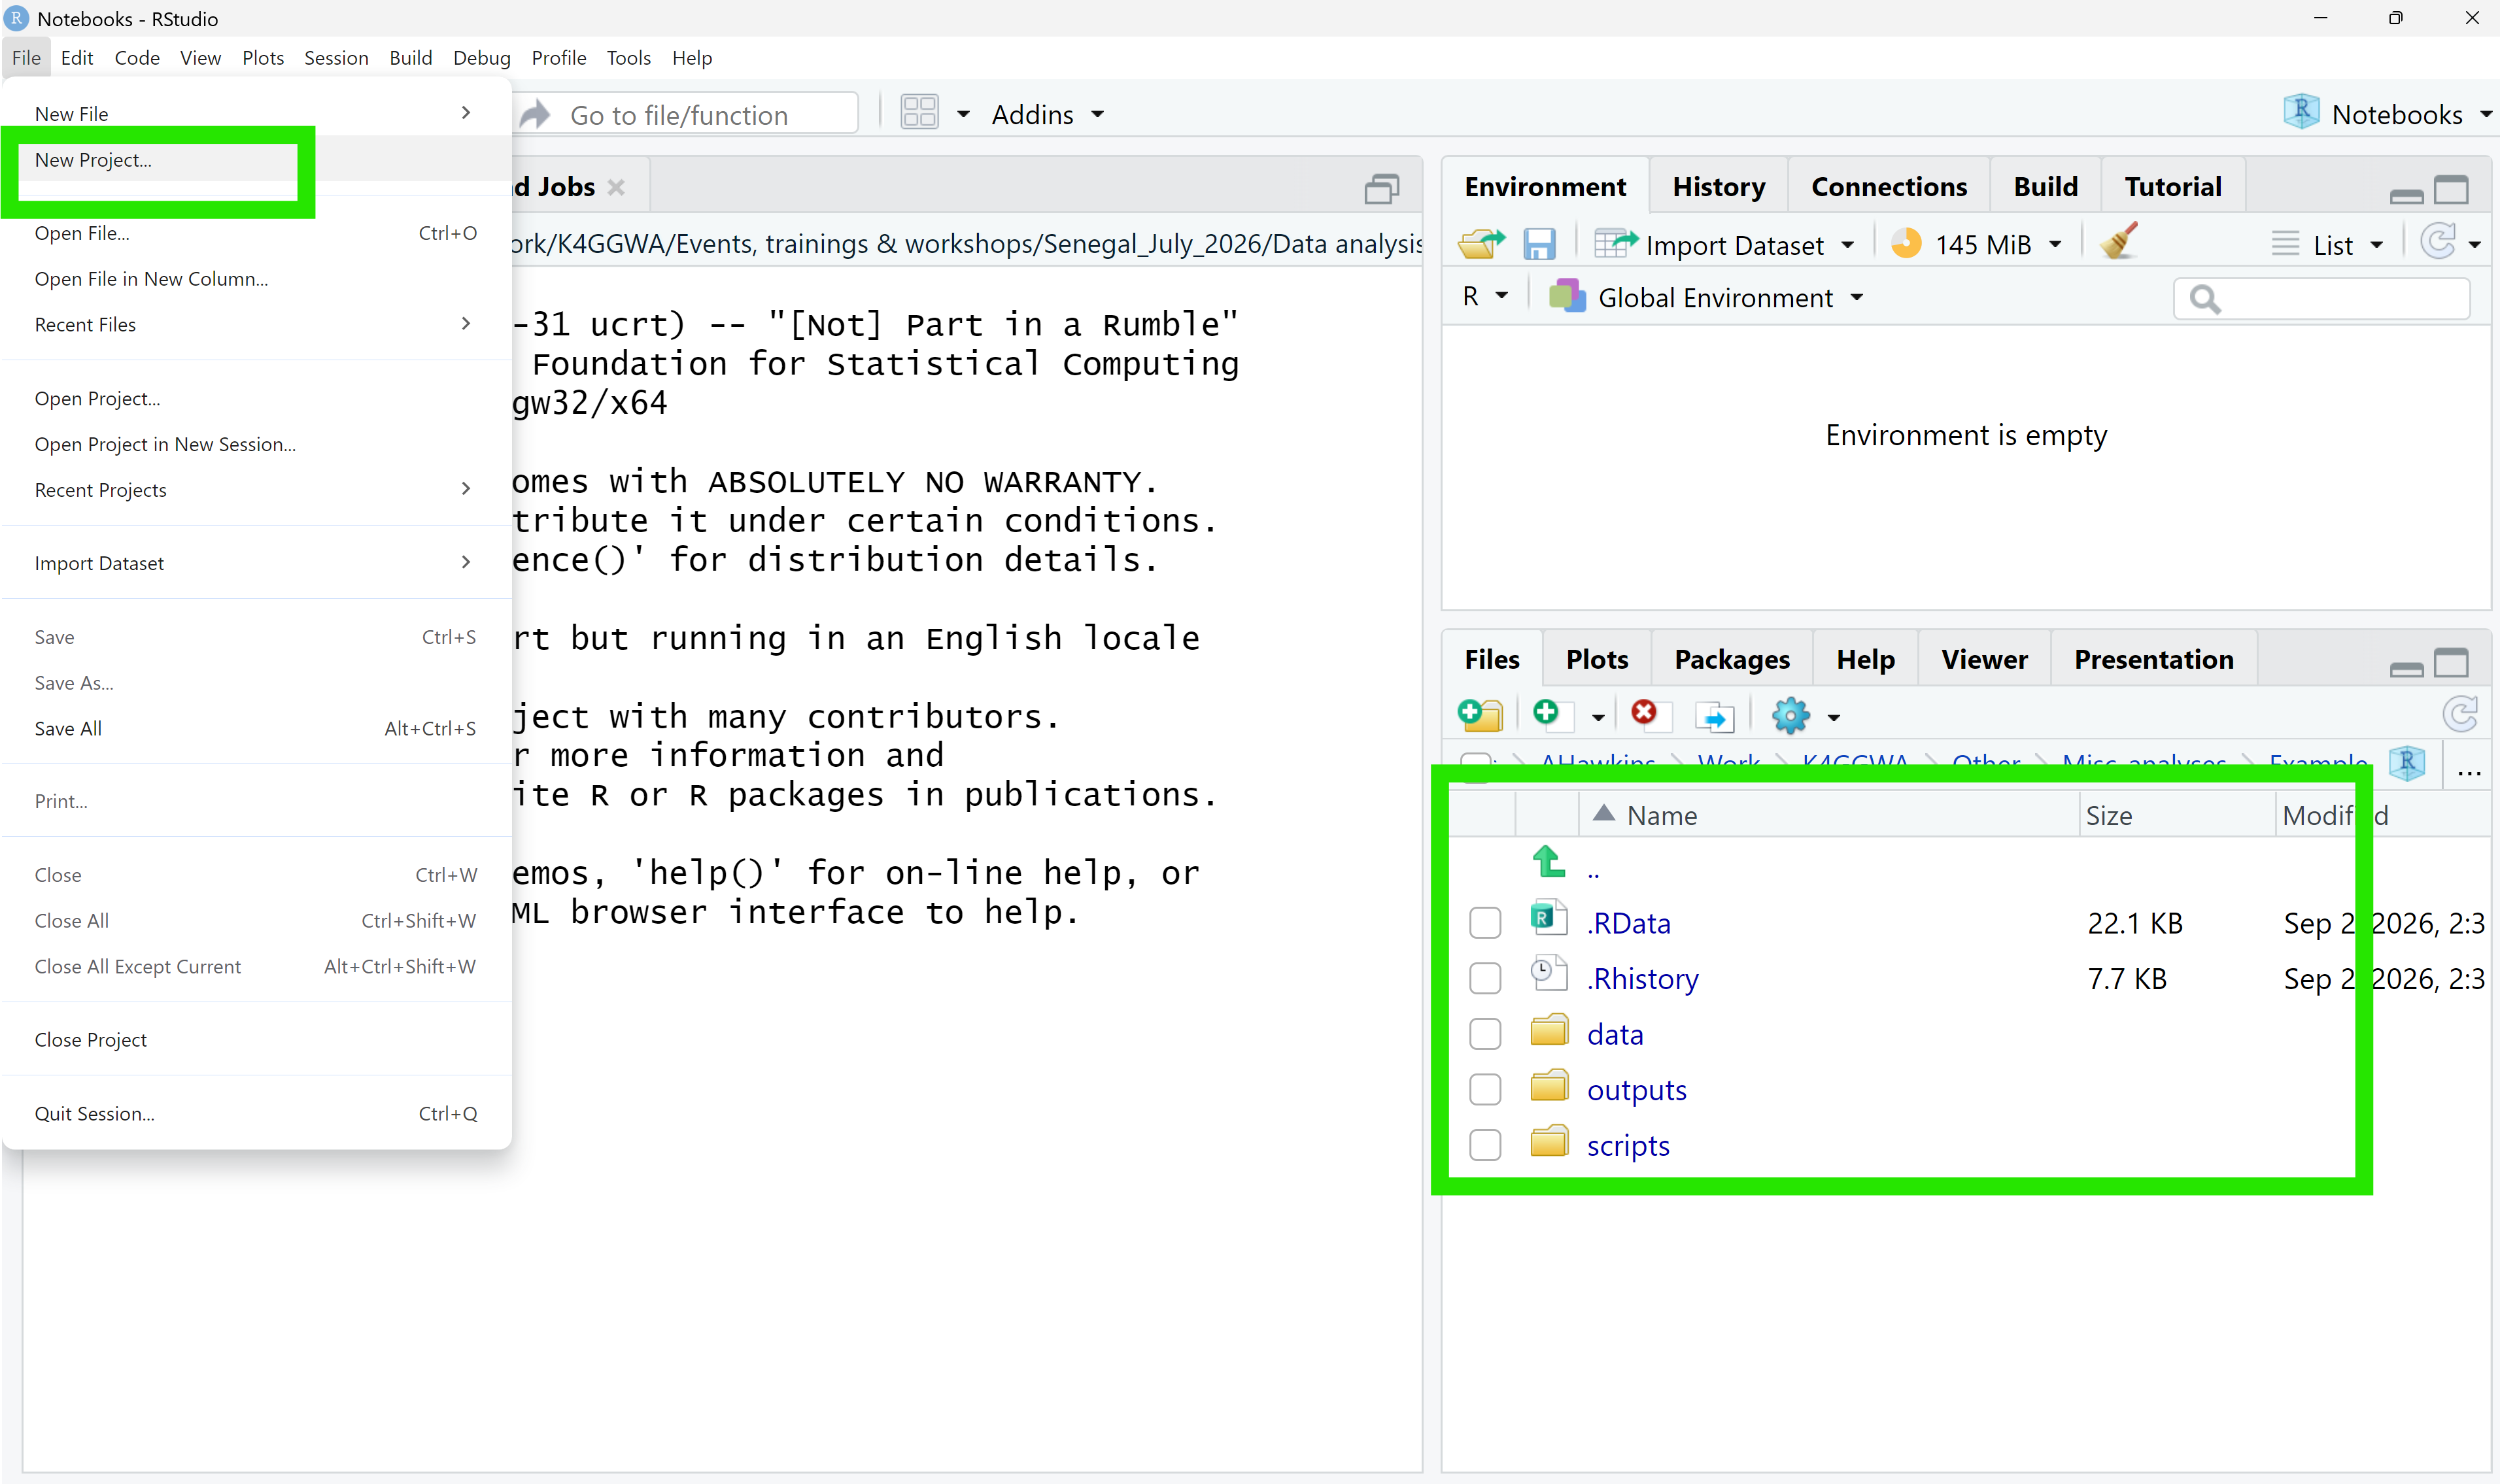
A couple of habits worth practising regardless of our project structure:
Avoid editing raw data in place. Keep the file exactly as found in data/raw/, and write any cleaning or corrections as code that produces a new file in data/processed/. This preserves the provenance and metadata questions from 2.2.2 - if something looks wrong later, we can always trace it back to the original.
Use consistent, descriptive file and folder names. Lower case, hyphens or underscores instead of spaces, and dates in YYYY-MM-DD format if a filename needs one. This keeps files easy to track, share, and understand at a later point in time.
3.3.2 A general workflow for spatial data tasks
With a project set up, we can follow a pretty standard workflow:
Identify Define the question or
decision we’re working towards
Find data Locate relevant,
fit-for-purpose datasets
Load, clean, inspect Ingest data
check CRS, extent,
resolution, missing values
Analyse Combine, summarise,
or model
Interpret and communicate Report findings,
with appropriate uncertainty
| 1. Identify the question or decision | Before we touch any data, be clear on the question or decision we’re working towards - as flagged back in 1.1 with our restoration decision-cycle and 3.1. This shapes everything that follows including which data will help us answer and address the question. |
| 2. Find data | With a question in mind, 3.1 covered how to discover and access relevant evidence - through our STAC catalog, or another provider’s. Bare in mind the considerations when working with spatial data 2.2.2: What is the variable? How it was produced? with what level of confidence/uncertainty can I apply this? |
| 3. Load data | Bring the data into R. {rstac} to find an asset, and {terra},{sf}, other relevant data handling packages to read it in. The getting-started notebook in the practicals gallery walks through exactly this for our own STAC catalog. |
| 4. Clean and inspect | Before analysing anything, check the basics: does the coordinate reference system (CRS) match across all our datasets/layers? Does the extent actually cover your area of interest? What resolution is the data at, and is that appropriate for your question, per the scale check in 2.2.2? Are there missing or NoData values you need to account for? |
| 5. Analyse | This is where the real work happens! Combining layers, summarising values within an area of interest, statistical modeling, per the decision-case 1.3.3. |
| 6. Interpret and communicate | Finally, we interrogate our results and bring them back to the original question, and communicate them the way 2.2.3 set out - clearly, with caveats on confidence and limitations. |
This isn’t a fixed one-way workflow and often real projects loop back over and repeat steps, especially between loading, cleaning, and analysing.
With our project organised and a workflow to guide us, we’re ready to get our hands dirty with real data and decisions! Head to the tutorial gallery, where you can put all of this to work with real GGW data.